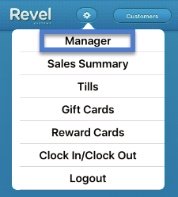
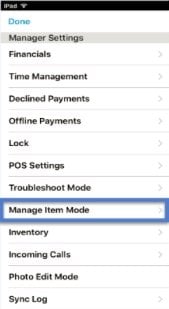
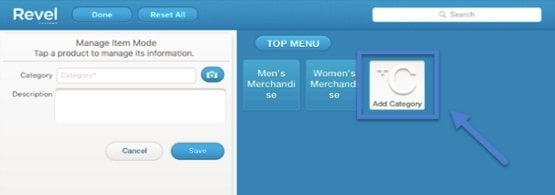
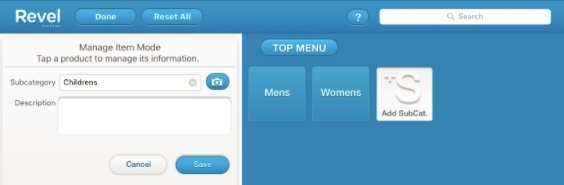
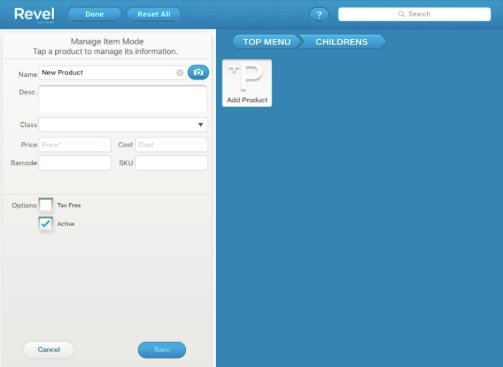
Are you a business owner who just CAN’T find the time to create a menu or a product list? Are you too busy running around your store/restaurant? Well, Revel has the solution for you! Revel’s Manage Item Mode allows you to add products directly to your POS system in just a matter of a few minutes. You can use Manage Item Mode to make quick changes to your menu/product list straight from the iPad POS. You can add new Categories, Subcategories, and Products, or tap existing Categories, Subcategories, and Products to make changes. Do it yourself by following the steps below.

  1. Log in to the POS system.
  2. Tap the Settings tab.
  3. Tap Manager from the Settings options.
    Settings screen
  4. Tap Manage Item Mode from the Manager settings.
    Manage Item Mode
  5. Tap Add Category on the POS menu.
  6. Add a category by inputting the name in the “Category” field located on the left hand side of the screen. Tap Save once done.
    Category input
  7. Tap the category which will hold the subcategory.
  8. Tap Add Subcategory on the POS menu.
  9. Add a subcategory by inputting the name in the “Subcategory” field. Tap Save once done.
    Subcategory input
  10. Tap Add Product on the POS menu.
    Add Product
  11. Fill in the required fields Product Name and Price. It’s also recommended to include a barcode and/or SKU. If one is not entered, Revel will automatically generate a barcode.
  12. Tap Save once done.

For more Revel POS 101, check out the Revel Knowledge Base full of helpful resources!