Call Sales: +1 (833) 437-3835
Call Sales: +1 (833) 437-3835
Revel | February 20, 2018 |

Tax season is just around the corner. And while it may not be the most exciting time of the year, it’s certainly an important one – and one, we all have to take part in. With Revel, this is no longer something you need to sweat.
In this article we will show you how to set up your taxes for success and get you prepped for tax season with a Revel POS:
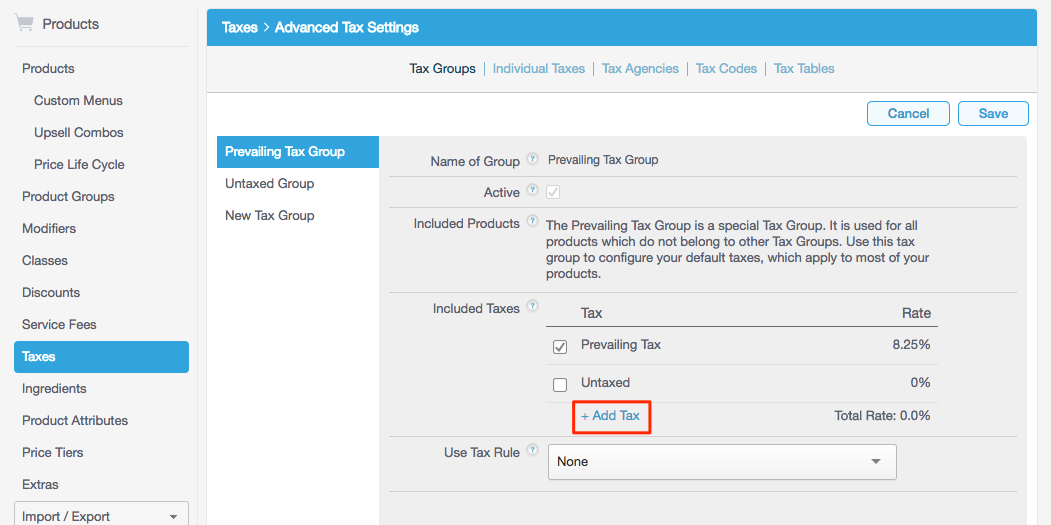
Your prevailing tax or "default tax," is the tax that is applied to all your products at the time of the order or transaction. Simply log in to your Management Console, then navigate to the “Products” tab and then select “Taxes”. Your Tax Wizard – a handy tool designed to help you set your prevailing tax rate – will have an initial rate set. To edit the prevailing tax click the plus icon next to the corresponding rate and click the tax rate amount until an edit box appears. Type in the new rate, click save, and voila!
After this has been completed, you are all set. The system will automatically include the prevailing tax to every transaction.
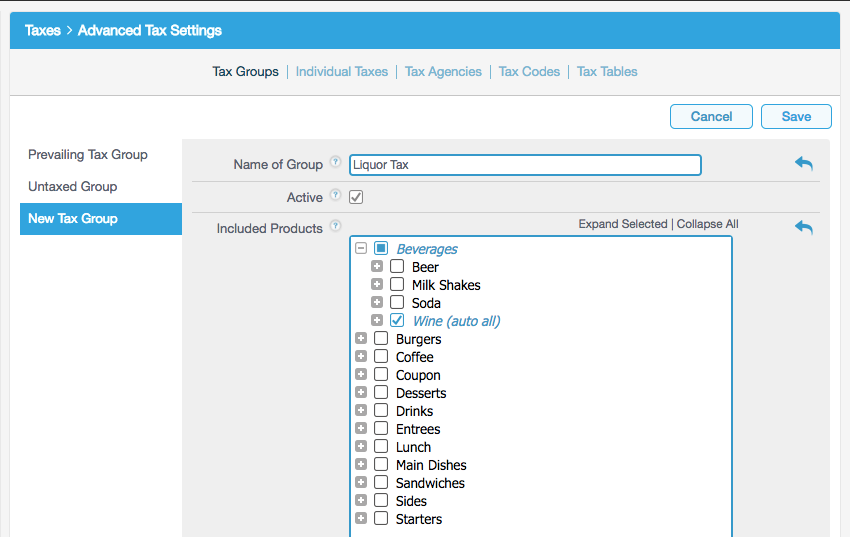
After you have set up your default tax, you can set up additional tax rates to be applied to different products. For example, if your business sells alcohol – you will need to apply a separate tax to your alcoholic beverages – once this new tax rate is created, this will replace the prevailing tax for the the items that fit under this new tax rate.
So, to create a new tax group you can navigate to the Advanced Tax Settings and click on New Tax Group. After you have named the new tax group, select +Add Tax, apply the percentage as well as the date-range the tax is effective.

Keep in mind that you can have multiple taxes per item! You are not limited to just one tax group or one specific tax applied to your products. Setting multiple taxes will apply the each taxed percentage amount to the base price of the product. For example, if a $10 bottle of beer has a 10% state tax + 5% county tax, the total would equate to $10 + $1.00 + $0.50 = $11.50.
For your items that are not taxed, it is important to define that within your Management Console. In Advanced Tax Settings simply click on Untaxed Group within the preset tax groups, and from there you can define the products that are exempted from being taxed.
Set your business up for success this tax season, and leave the number crunching up to Revel. To learn more about setting up taxes on a Revel iPad POS System you can read our support notes here and access video tutorials here.